Step 1
1.First create a new file Go to file -> New or cntl + N
width = 8 inch
Height = 6 inch
Resolution = 300
Background color = Grey
width = 8 inch
Height = 6 inch
Resolution = 300
Background color = Grey

Step 2
2.Then create new layer Go to Layer -> New -> Layer or use
the short cut Shift+cntl+N. Select Elliptical Marquee tool,
then select fixed size 5inch X 5 inch and draw a round and
filled it with white using paint packet tool or Edit -> Fill.
the short cut Shift+cntl+N. Select Elliptical Marquee tool,
then select fixed size 5inch X 5 inch and draw a round and
filled it with white using paint packet tool or Edit -> Fill.

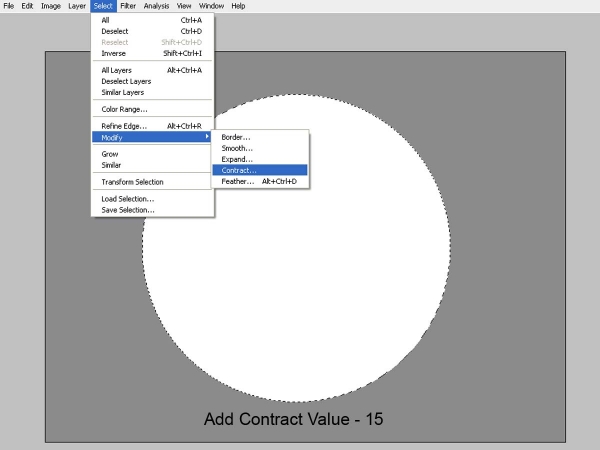
Step 3
Then Go to Select -> Modify -> Contract -> value 15
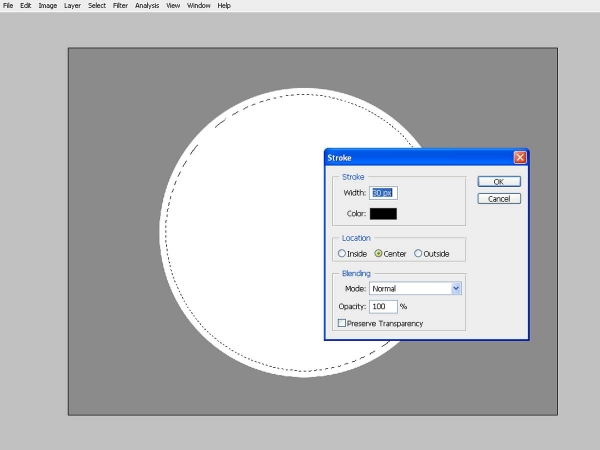
Step 4
Now Create new layer then Go to Edit -> Stroke and apply
stroke with the following values.
Width - 30px
Color - Black
stroke with the following values.
Width - 30px
Color - Black
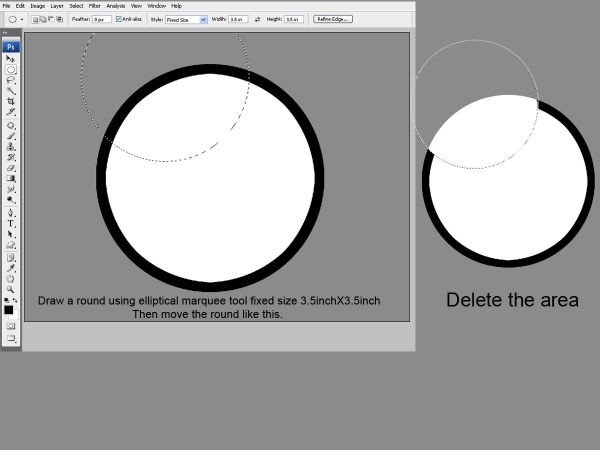
Step 5
Now it's a simple method to create the Football's outline.
Select elliptical marquee tool with the
fixed size 3.5 in X 3.5 in and move the round
using the move tool (see the step 5), then delete
this particular area.
Select elliptical marquee tool with the
fixed size 3.5 in X 3.5 in and move the round
using the move tool (see the step 5), then delete
this particular area.
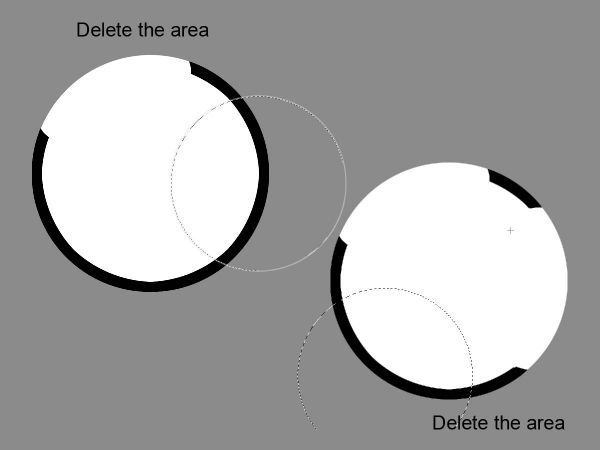
Step 6
Do the same like this.
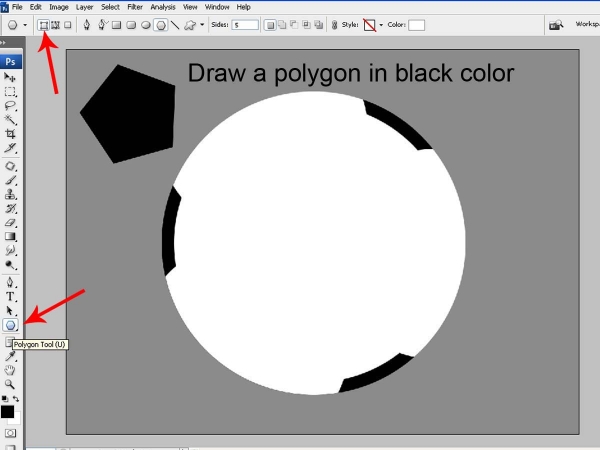
Step 7
Select Polygon tool and draw a polygon in black color.
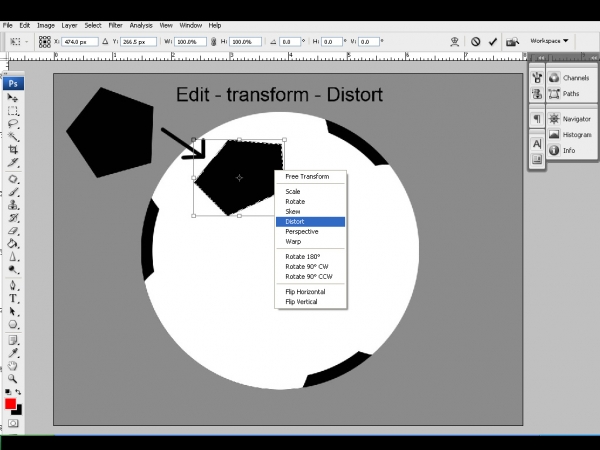
Step 8
Then Go to Edit - Transform- Free transform and right click the mouse button and select the "distort" and adjust the polygon like this.
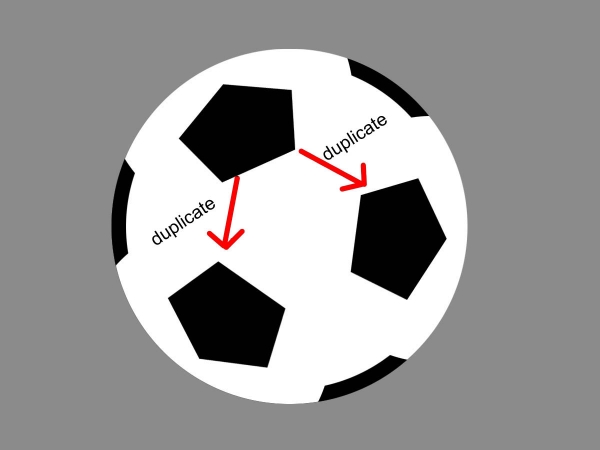
Step 9
Then duplicate the polygon and arrange it like this.
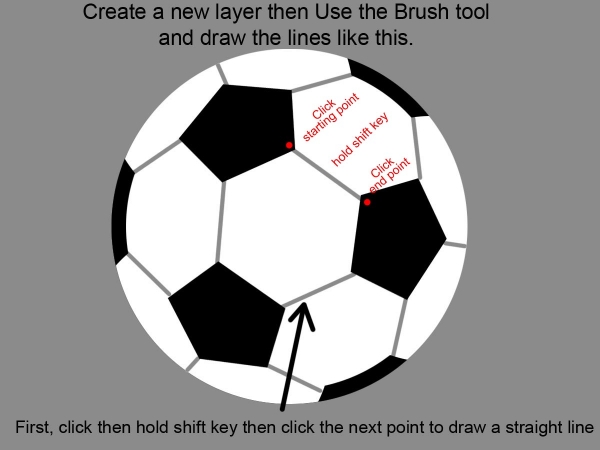
Step 10
Create new layer and select brush tool with gray color and the brush size is 12px and the hardness is 100.Now draw the lines(see step 10).It's easy to create straight line.First click the
starting point and hold shift
 key and click the end
point.
starting point and hold shift

point.
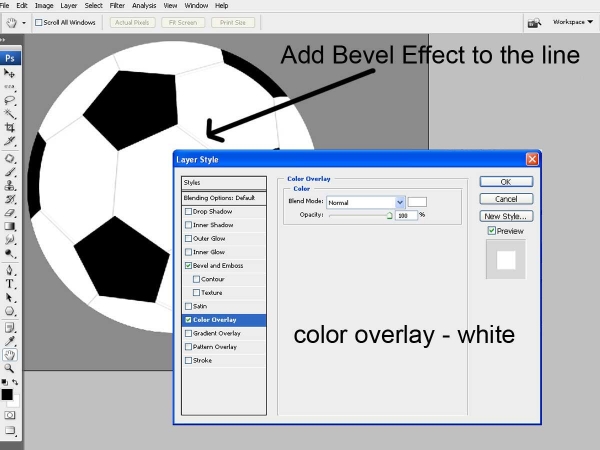
Step 11
Add bevel effect to the lines.simply double click the layer to select blending option or Go to layer -> layer style -> blending option and add this following values,
color overlay - white
Bevel - see the step 11
color overlay - white
Bevel - see the step 11
Step 12
Now create the football's shadow.See the details below.

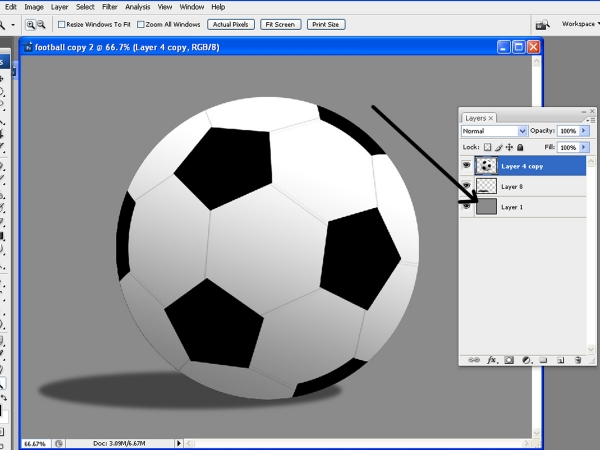
Step 13
Now merge all layers (hold cntl key
then select the layers then cntl+E to merge) except
background and shadow layer.Then delete the
background layer.
then select the layers then cntl+E to merge) except
background and shadow layer.Then delete the
background layer.
Step 14
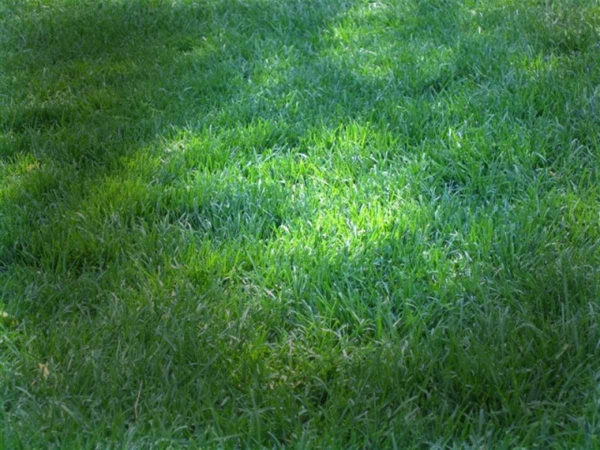
This image is my image collection and I used this grass to the football's background.
Step 15
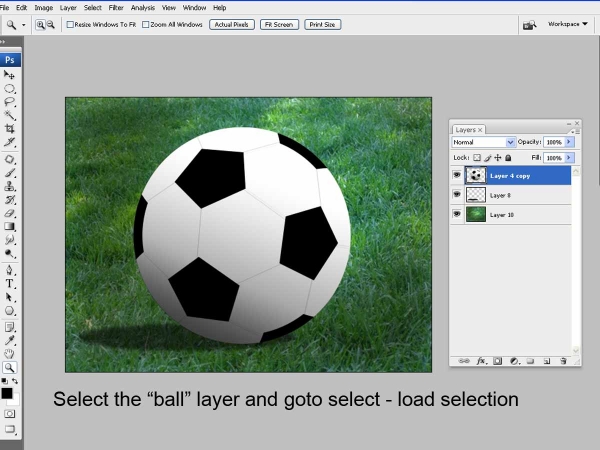
Now select the grass layer and then send it to back to the football layer.(Go to Layer -> Arrange -> send backward)

Step 16
select the football layer and then go to Select -> Load selection -> press ok.
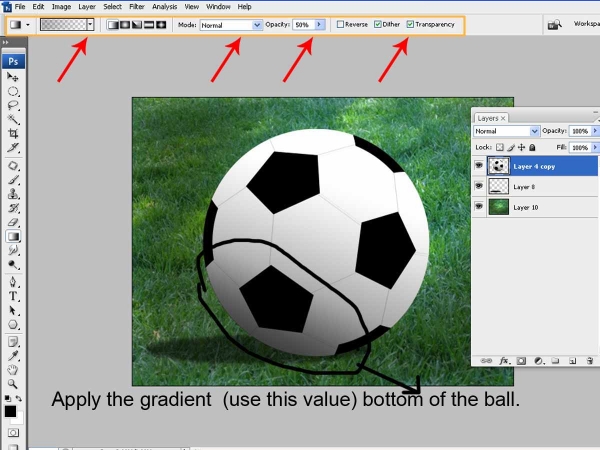
Step 17
Now the ball is in load selection, then apply the gradient to the following values (see the image below).
Step 18
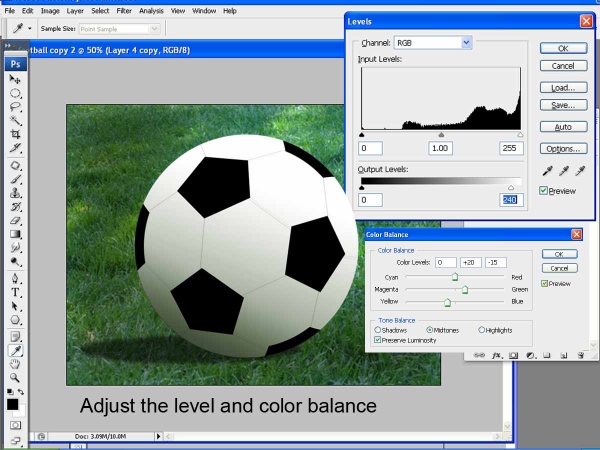
Then adjust the football's color.
Step 19
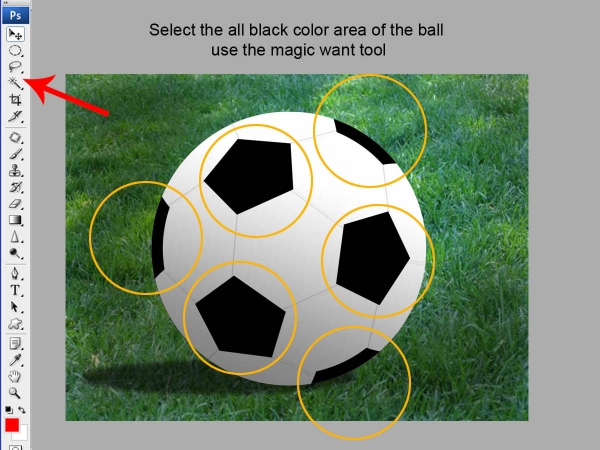
Select the all black color area in ball's outside using Magic wand tool.
Step 20
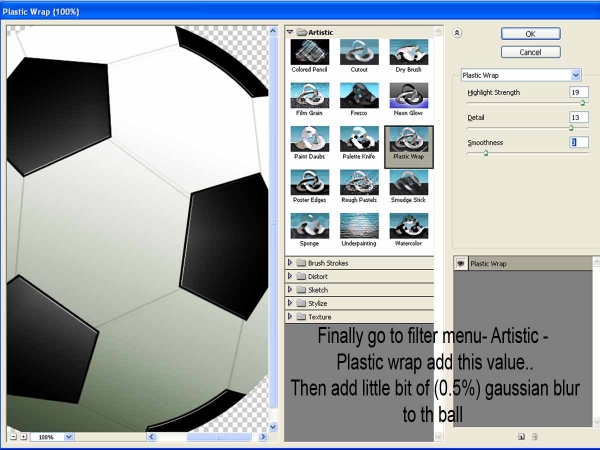
It's a final and important step of this tutorial. select all the outside black parts of the ball then go to Filter -> Artistic -> Plastic warp, then apply the following values. (see the step)
Step 21
This is the final image.Hope you all enjoy this tutorial.Take care.


ليست هناك تعليقات:
إرسال تعليق