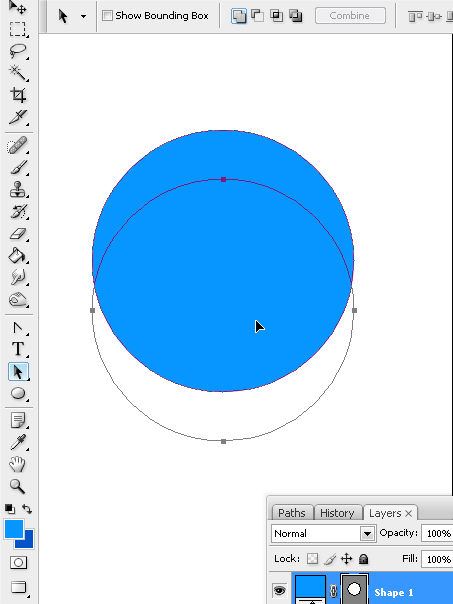
Step 1
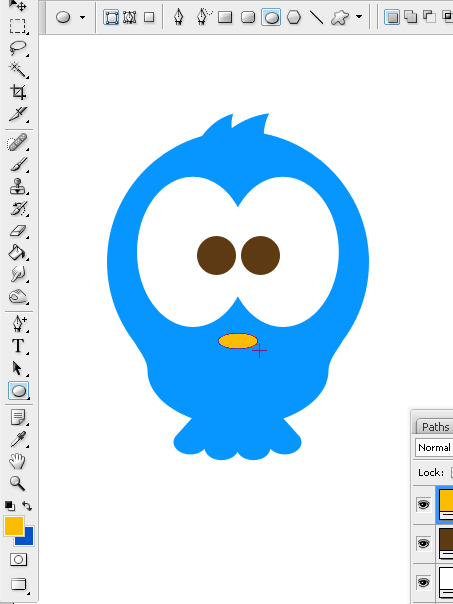
In a new PSD file of 800×600 pixels, 72 dpi, RGB color and white background, we will draw a circular shape layer, color #0099FF. By pressing Shift you can create a perfect circle no matter in which direction you drag your mouse.

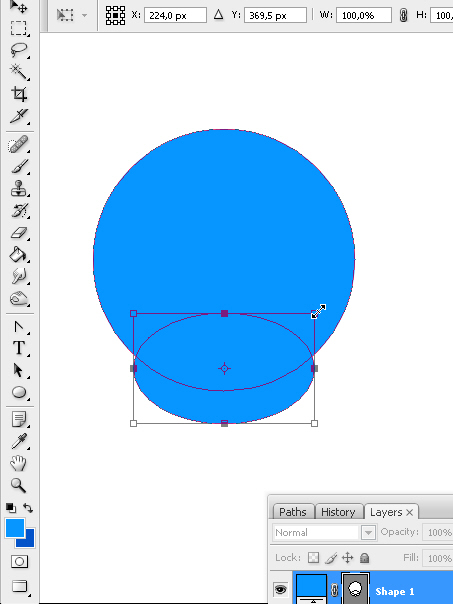
Step 2
By pressing Alt + Shift we will duplicate this shape down to create the head and body of the character. Both vectors will remain inside one unique layer.
Step 3
We will change the proportions of the duplicated circle. The object’s controls will appear when you press Cmd/Ctrl + T.

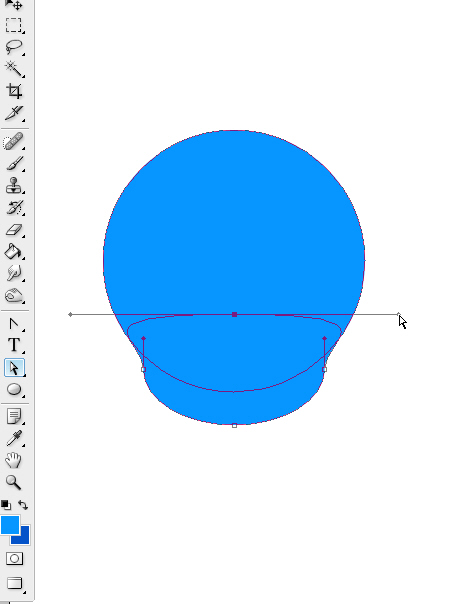
Step 4
With the Direct Selection Tool arrow we will take the upper curve of the circle to the edges of the other one to create opposite curves that will softly link head and body.
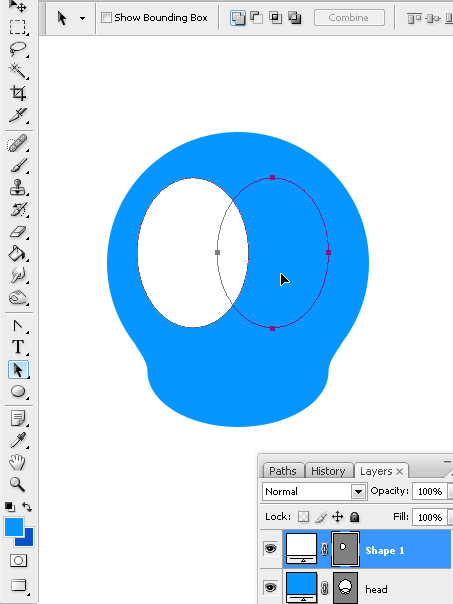
Step 5
We will create some shape layers to later add layer styles. For the eyes, we will create a vertical oval that will be duplicated as we did previously.
Step 6
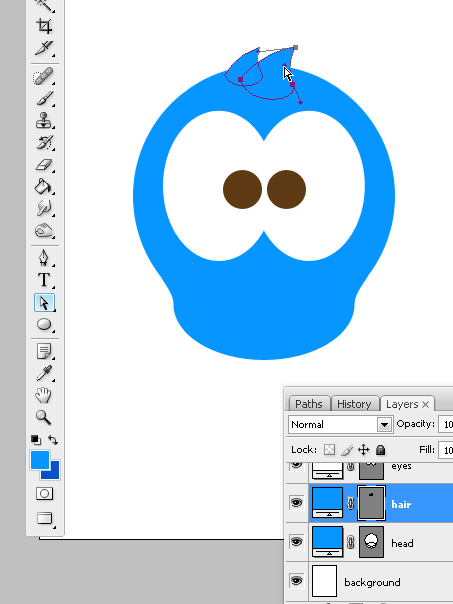
When we are finished with the eyes, we will create some hair for the character using two similar vectors of different sizes to gain depth.
Step 7
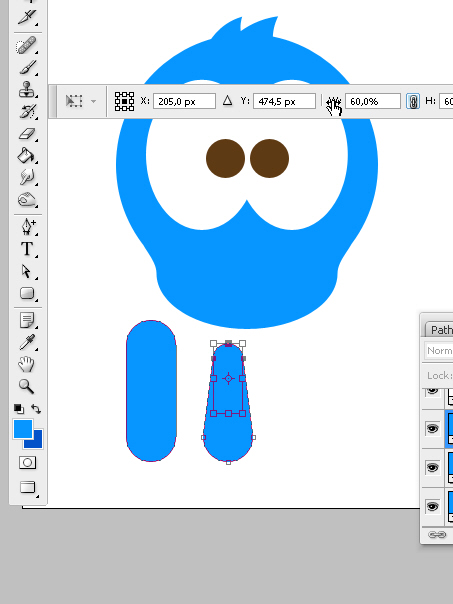
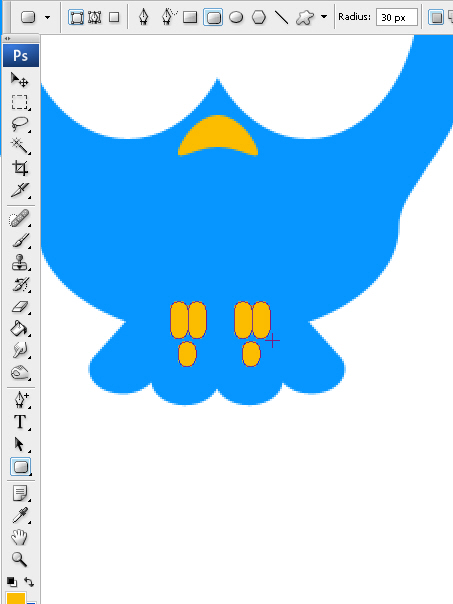
Now it’s the turn of the tail feathers. We will draw a rectangular vector with a rounded corners shape layer, setting a 30 pixels radius. With the Direct Selection Tool we will select the 3 upper anchor points and by pressing Cmd/Ctrl + T the direction points will appear. In the upper menu, we will click the link proportions tool and with a horizontal click + drag over the letter “W” (width) we will reduce these anchor points 60% from its original size.
Step 8
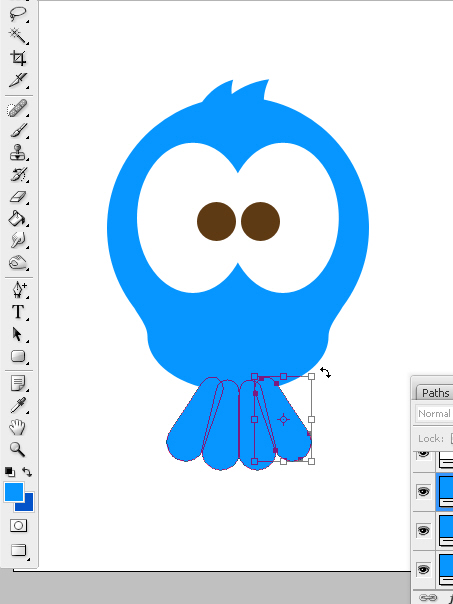
We will duplicate, reduce and turn 4 copies of this anchor point to create the feathers group for the tail of our bird.
Step 9
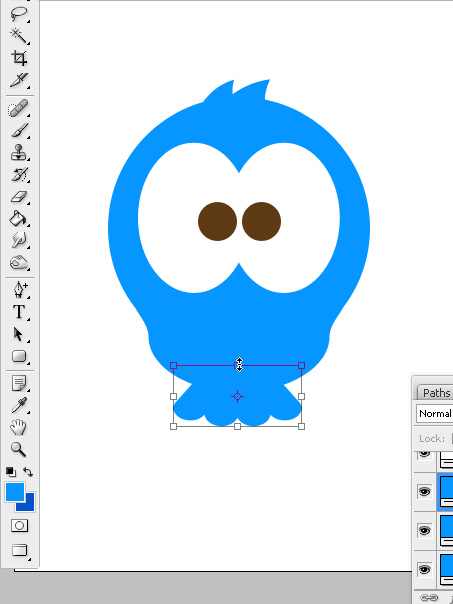
We will reduce the height of this group of vectors by selecting all of them and pressing Cmd/Ctrl + T.
Step 10
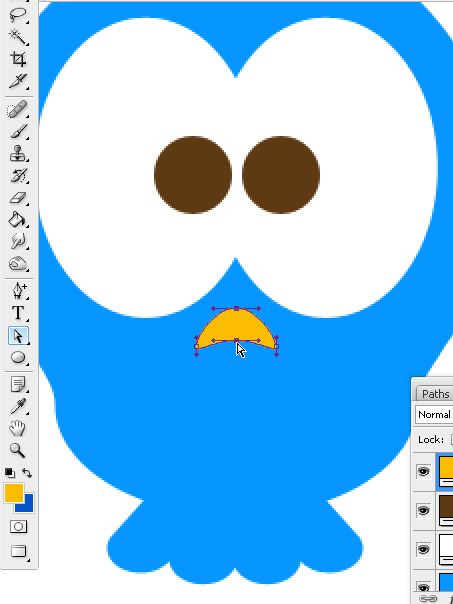
Now we will create the bird’s beak with a small horizontal oval that we will edit in a simple way.
Step 11
By selecting the upper and bottom anchor points and taking them some pixels up we will create a sadness expression.
Step 12
We will use again the rectangles with rounded corners in 30 pixels to create the fingers (3) on the character’s feet that we will later duplicate to get the pair.
Step 13
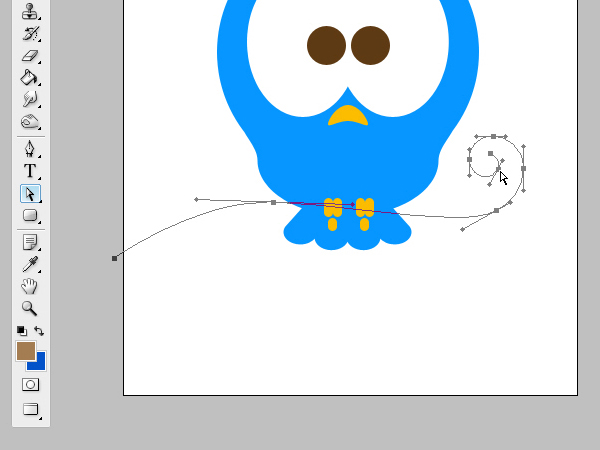
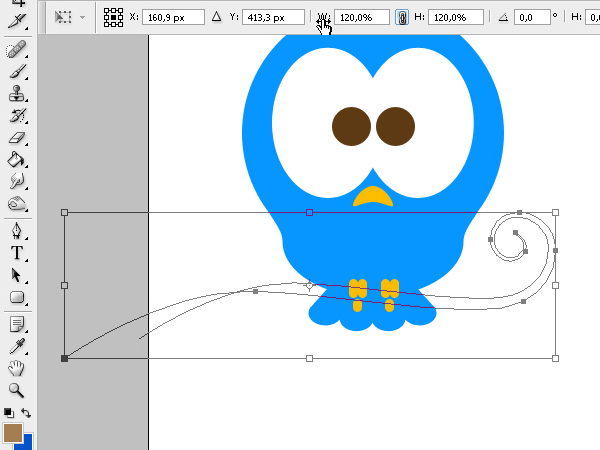
With the Pen Tool we will draw a tree branch. Using click + drag you will be able to create anchor points with curves control points that you will later adjust with the Path selection arrow.
Step 14
Duplicate this vector and we will enlarge it a 20% following the same steps used in the modification of the upper menu.
Step 15
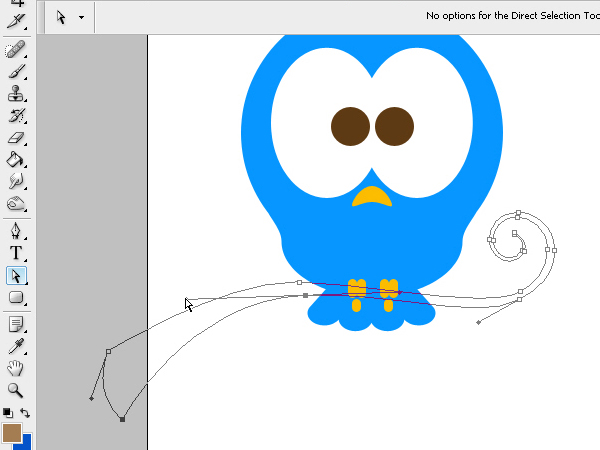
Adjust the base of the branch to increase its thickness while it approaches the tree trunk. Then we will unify both lines with the Pen Tool to get one solid vector.
Step 16
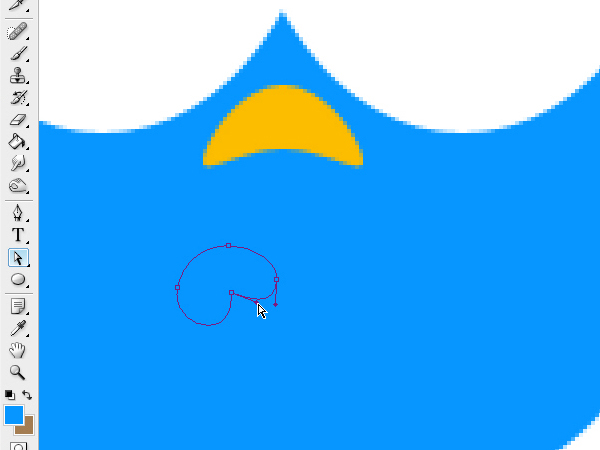
Now we will create the fingers on both hands of the bird. Starting from a circle you can modify the vector and create anchor points with independent direction points, pressing the Alt key while you try to change the controls in a curve. In this way the anchor point you can see in this edition it’s now a corner and not a curve, and it has two independent controls for you to move them as you wish.
Step 17
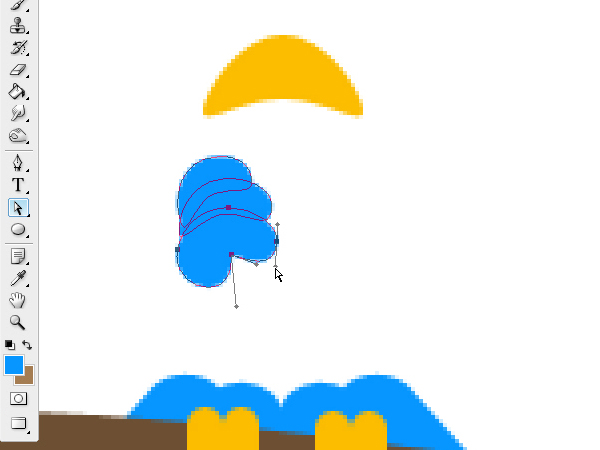
We will draw 3 fingers for each hand. They will be placed in a praying position and then the fingers will be seen intertwined.
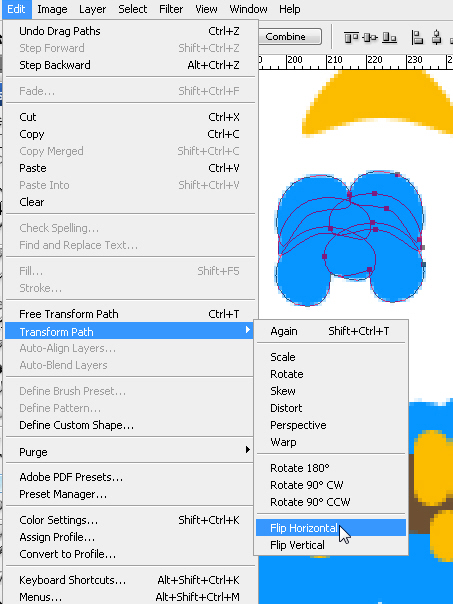
Step 18
Once we’ve created the fingers of one hand, we will duplicate them by dragging with Alt + Shift pressed and then we will go to Path > Flip Horizontal to flip the duplicated hand.
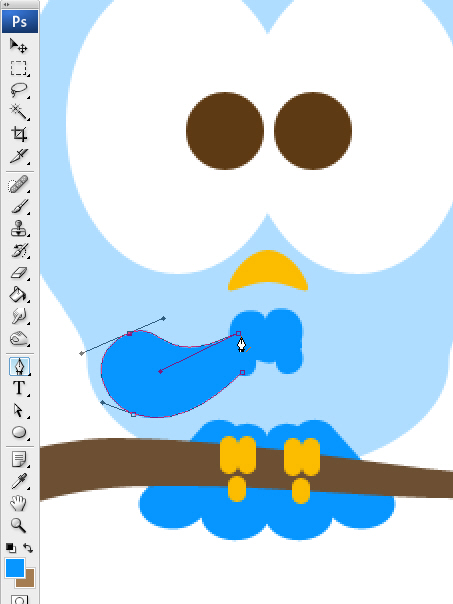
Step 19
With the Pen Tool we will create the arms of the character.
Step 20
Now a tear will fall on the bird’s left cheek, in 3 steps. We will draw a circle, we will select the upper anchor point and we drag it up. With the Convert Point tool we will make a click to convert it into a corner.

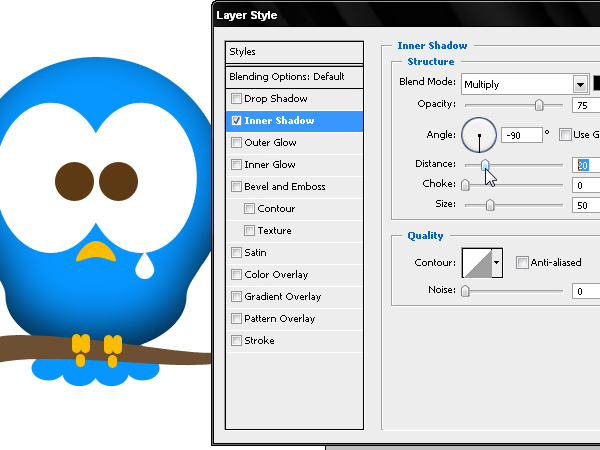
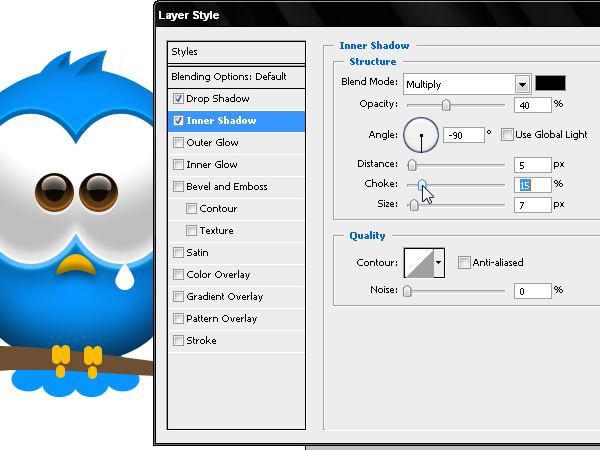
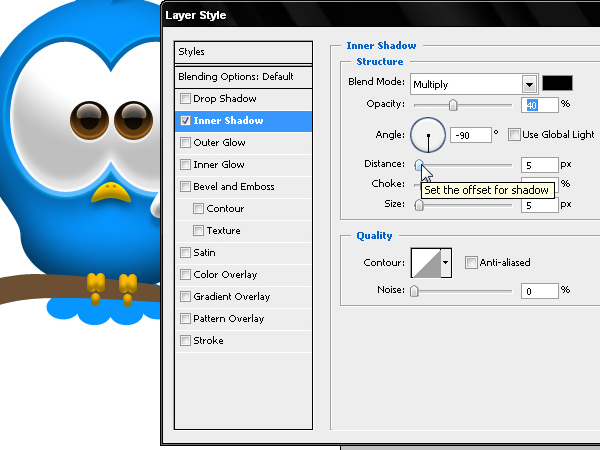
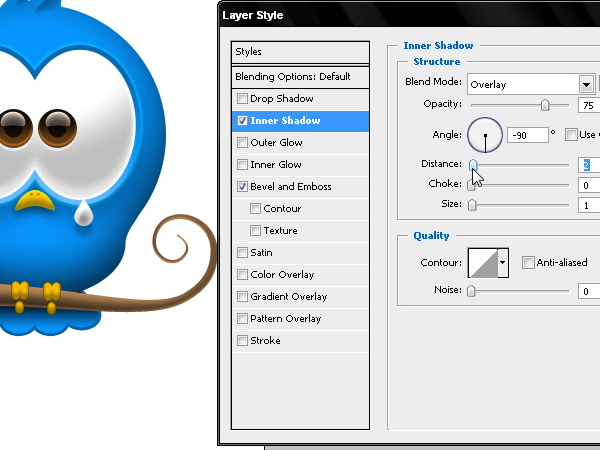
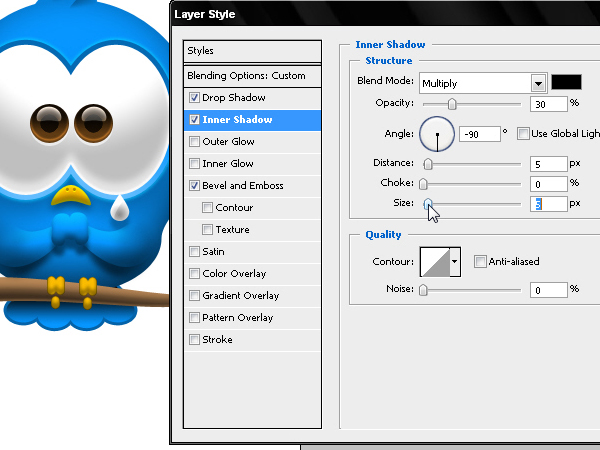
Step 21
We will finally start to add some layer styles. By hiding the hair and arms layers to visualize better what we will do on the body, we will add an Inner Shadow to our vector by unclicking the Use Global Light option and taking the angle direction of the effect to -90 degrees to get a shadow in the inferior area of the character.
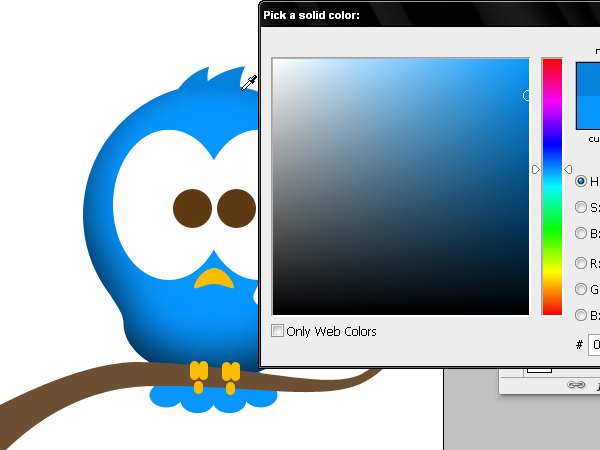
Step 22
We will make the hair or head feathers layer visible again. Now that its Inner Shadow has a darker tone on its edge, we will make double click on the color of the shape of the hair’s layer. When we open the color editor we can extract the exact tone of the head’s edge so these hairs can be perfectly integrated with the rest of the body.
Step 23
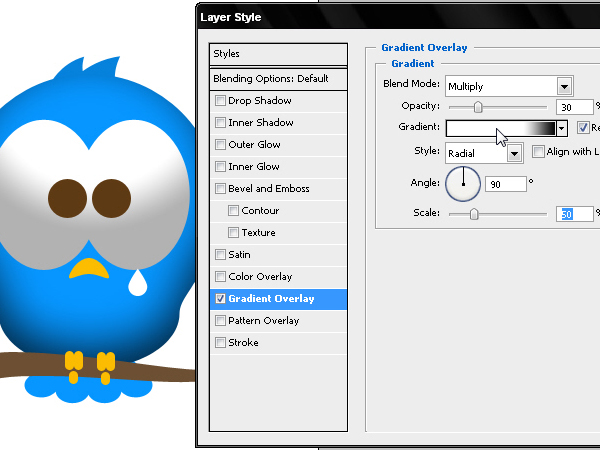
Now it’s the turn of the spherical volume of the eyes. We will use a Radial Gradient, unclicking the Align with Layer option so the gradient won’t be limited to the shape’s edges. We will reduce its size a 50% so the change from one color to the other won’t be so soft.
Step 24
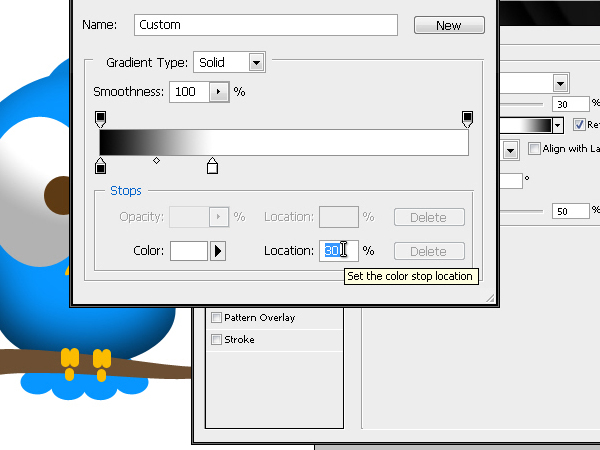
Inside the gradient editor (make a double click on it) we will place the white color on a third part of the starting point so our gradient can be even more precise and sharp.
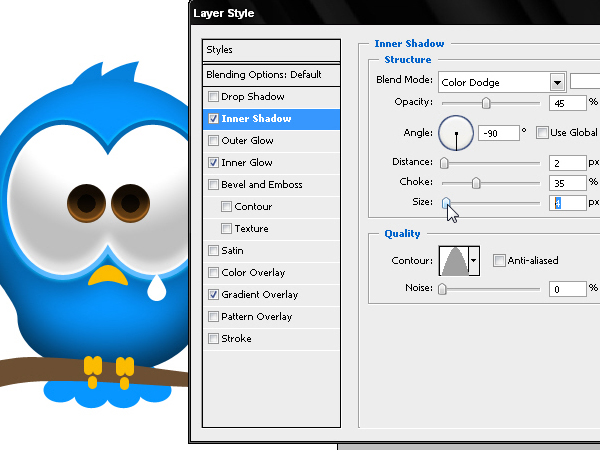
Step 25
Now we will use an Inner Shadow but just to light, providing a inferior reflection on the eyes, coming from the general light of the scene.

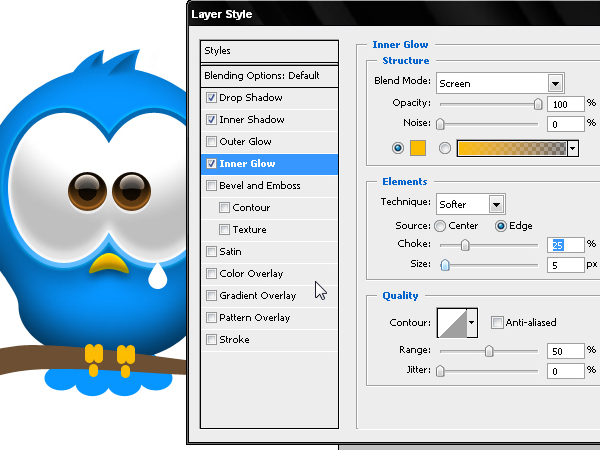
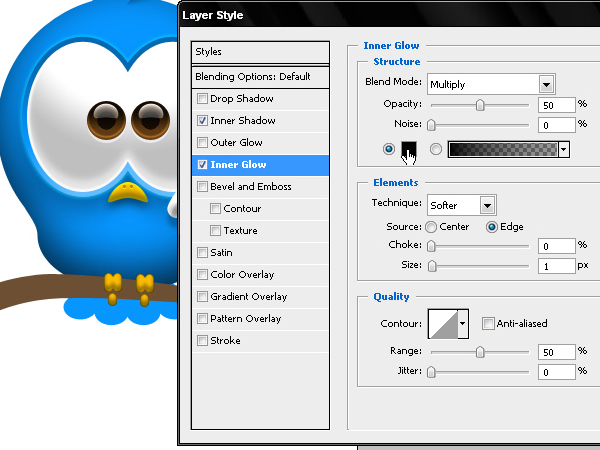
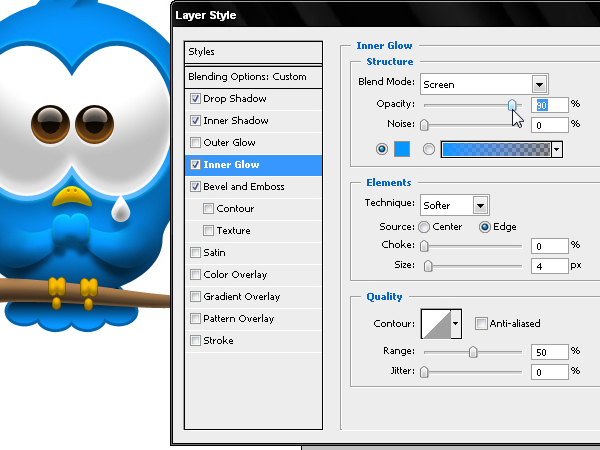
Step 26
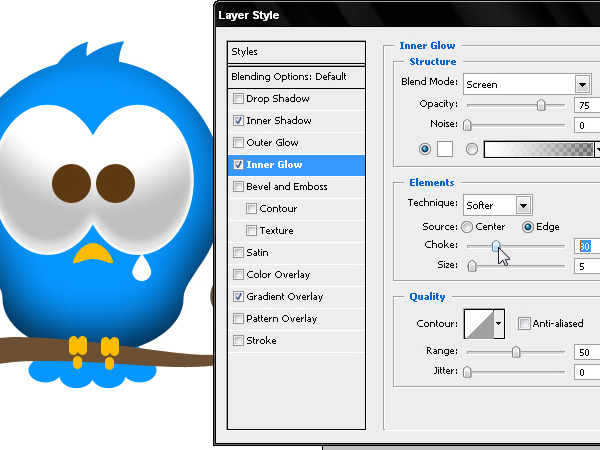
We will apply an inner glow on the eyes edge with the values shown on this image.
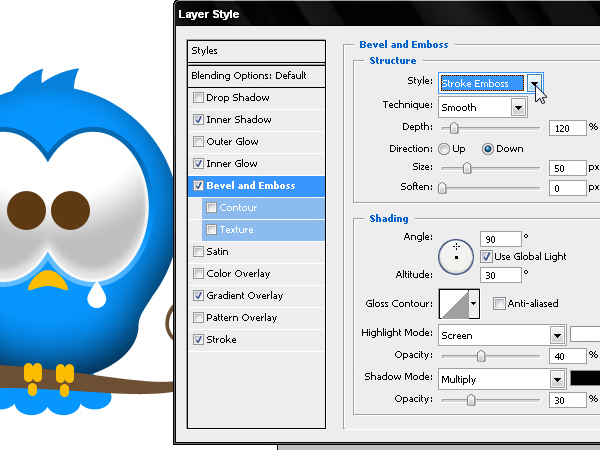
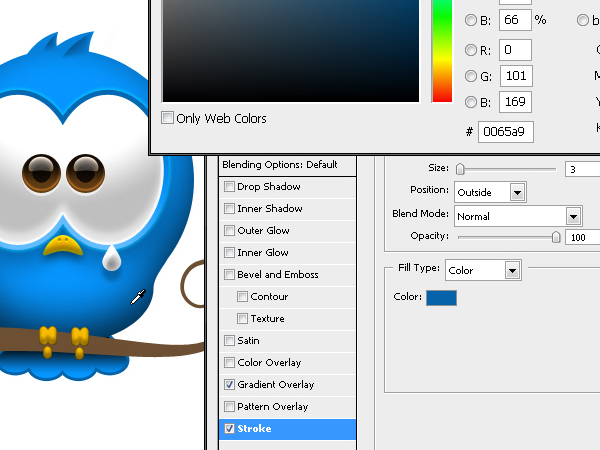
Step 27
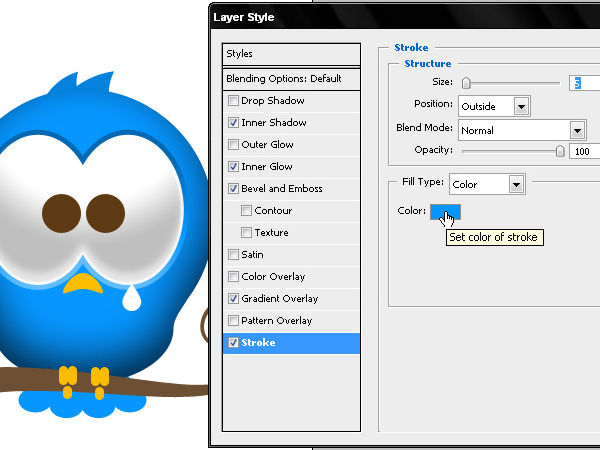
We will create a bevel around the eyes, using Stroke, and Bevel and Emboss. We will first use a stroke of the same color of the character, #0099FF.
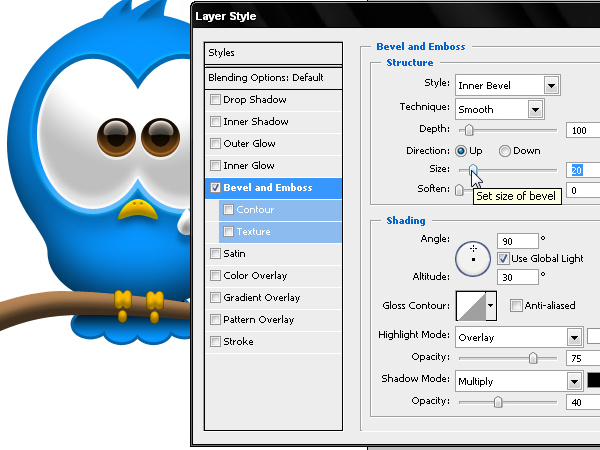
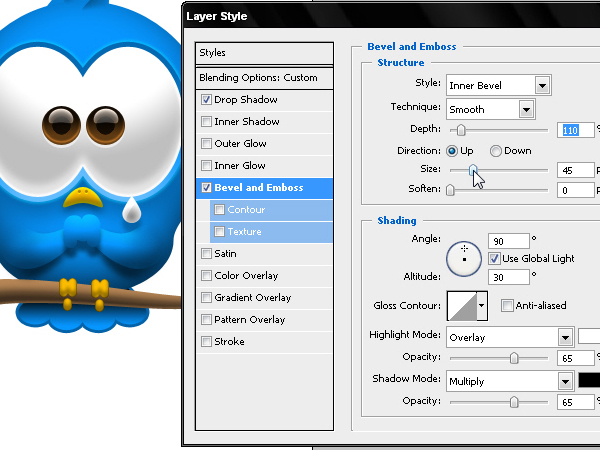
Step 28
Now we will use the bevel and extrusion to get some shadow on the upper area (as the light does not impact there) and to have a clearer bottom area to give a 3D effect on this bevel.
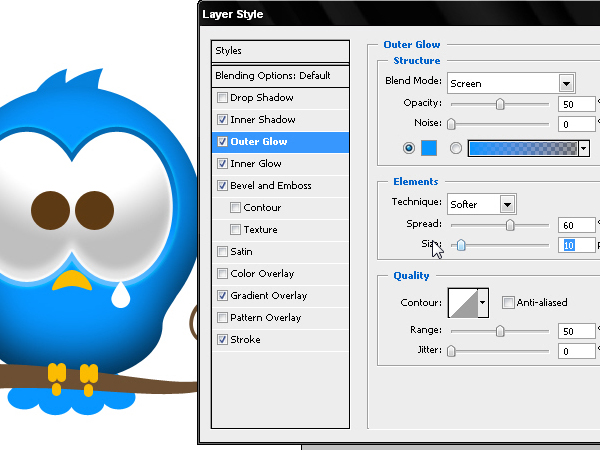
Step 29
Some Outer Glow around the eyes bevel will make this edge have a plastic appearance glow.
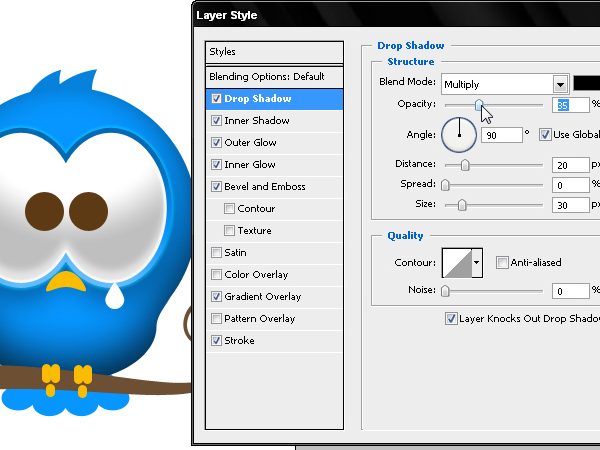
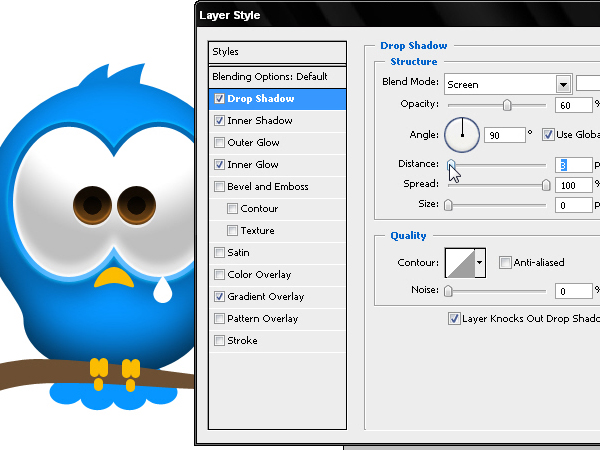
Step 30
Finally a soft Drop Shadow to go together with the opposite curve of the body of the bird to get some shadow there where the neck folds in.
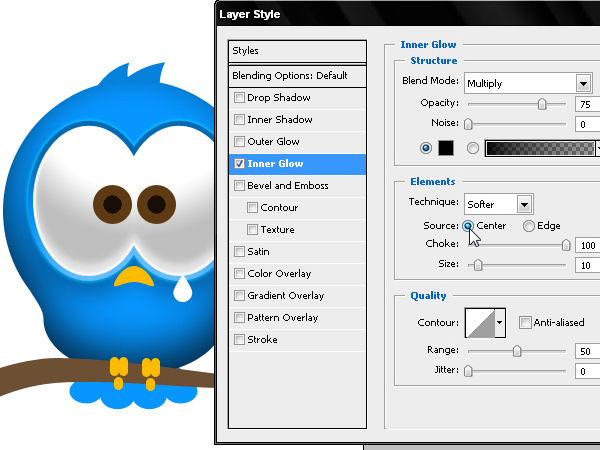
Step 31
In the eyes iris we will include the pupils using layer styles. We will use a black Inner Glow and Multiply blend, checking the Source Center option for the glow to start from the center of the figure and not from the edges as it’s usually used. We will take the Choke to 100 and the glow to 10 and we will get two black circles perfectly sharp.
Step 32
Now we will use a Linear Gradient to create volume inside the iris. Anytime you’d like to add an acrylic glow it will be always better if the gradient makes darker the upper area.
Step 33
Here we will use the Inner Shadow style to light the inferior edge of the iris by using a different contour quality than the one that appears by default, unclicking also the global angle of the light.
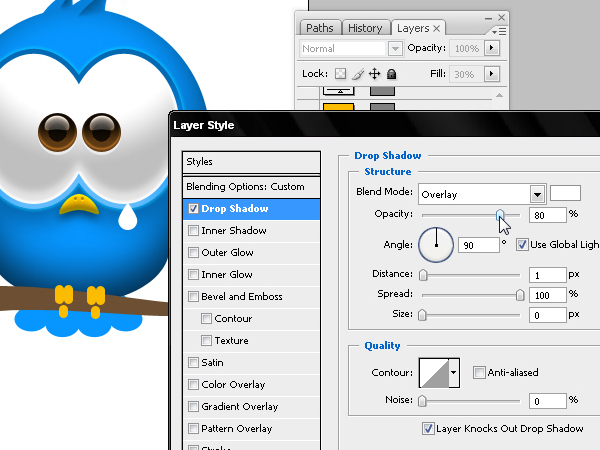
Step 34
A Drop Shadow is used here to light a bevel around the irises to create an insertion effect on the eyes.
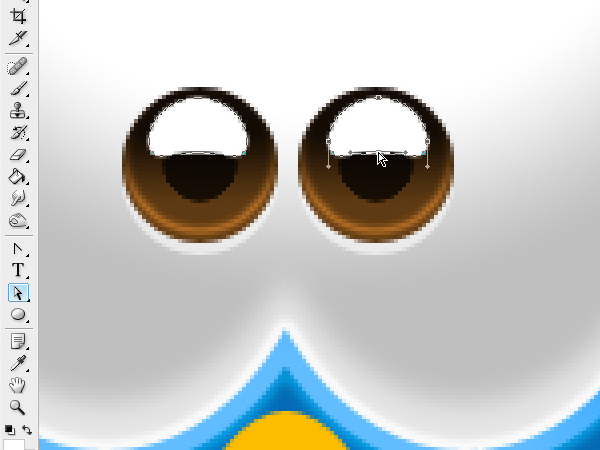
Step 35
Now the acrylic glows for the eyes: this typical effect gives the lubricated appearance. With 2 horizontal ovals we will edit its inferior anchor points to create this photo studio reflection on the eyes.
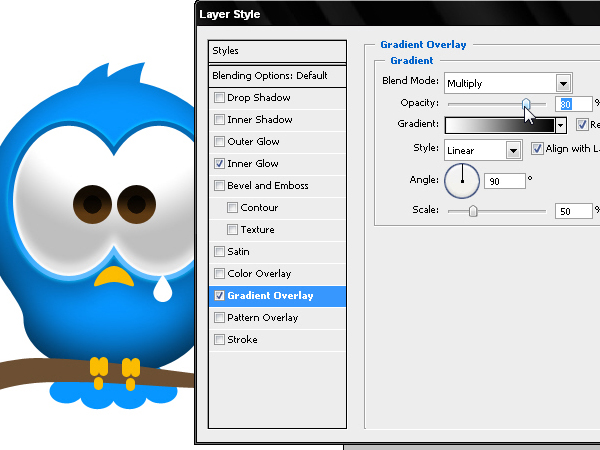
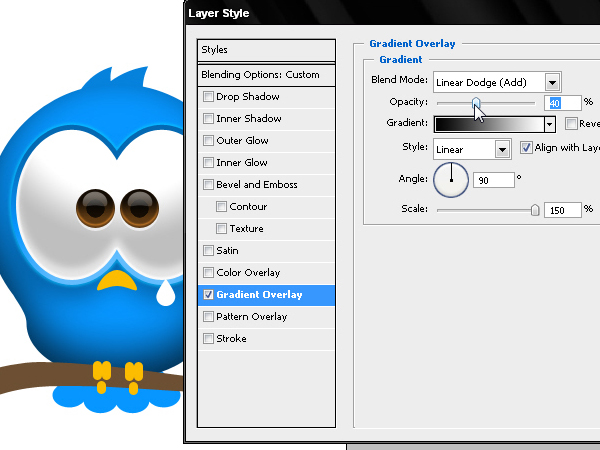
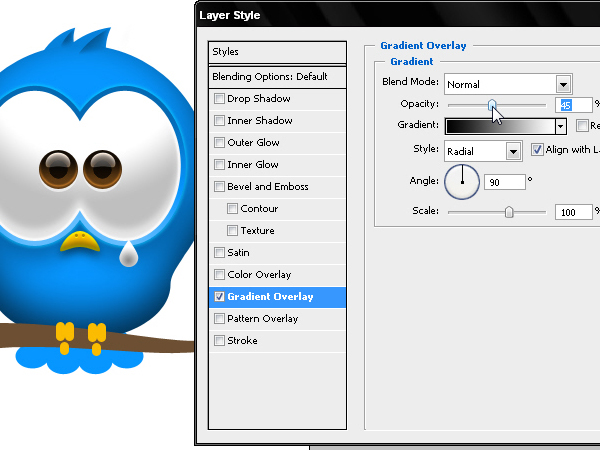
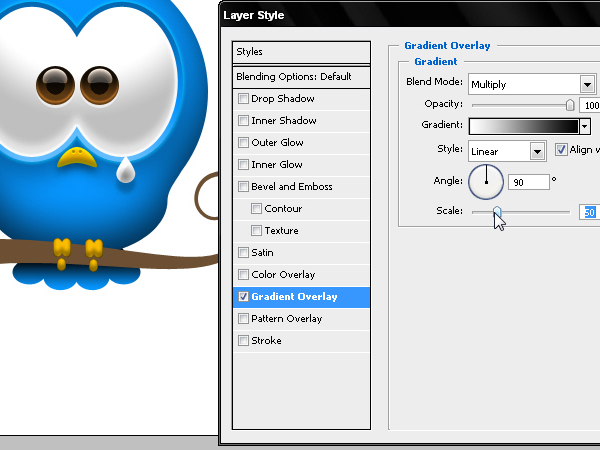
Step 36
We will take the shape layer transparency to zero and we will add a Gradient Overlay with these values. Remember you can move the position of the gradient using click + drag on the layer when you are editing this gradient.
Step 37
Now we will add an upper glow that will reinforce the light source appearance on a highly reflective surface.

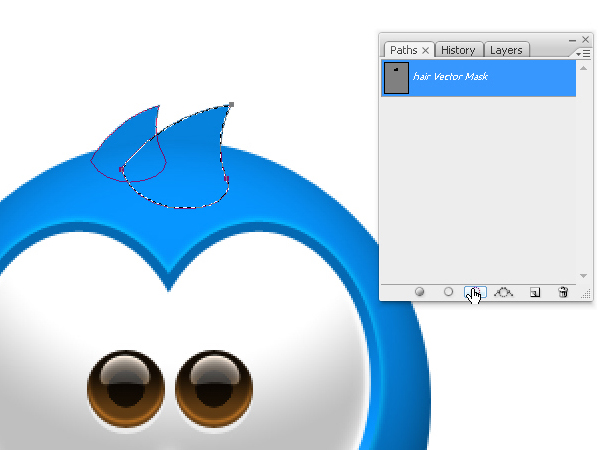
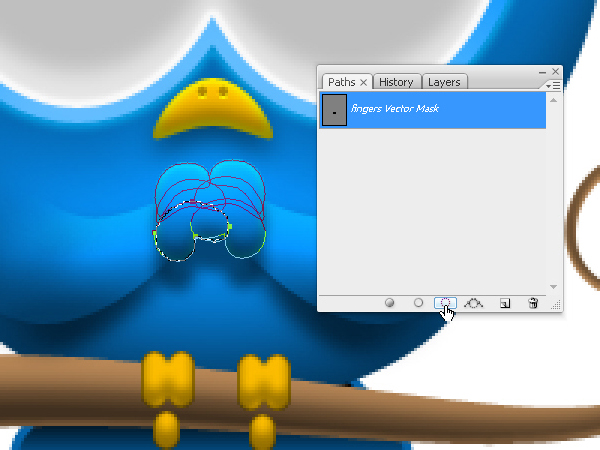
Step 38
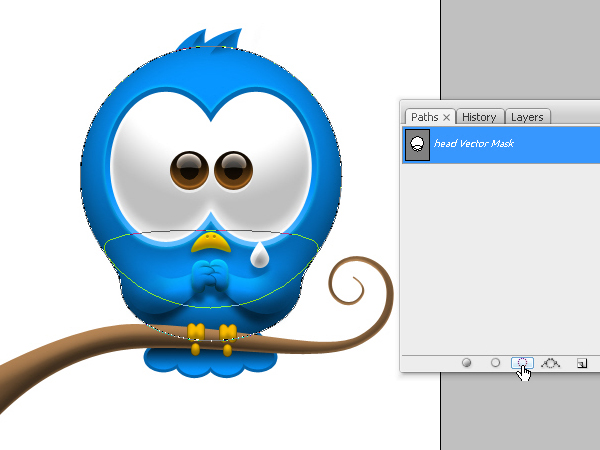
We will now take care of the projected shadows on the hairs of the head. Selecting both shapes in the Layers section, we will go the Paths section where we will see our vectors selected there too. We will convert these vectors into selection by using the options menu below the floating window.
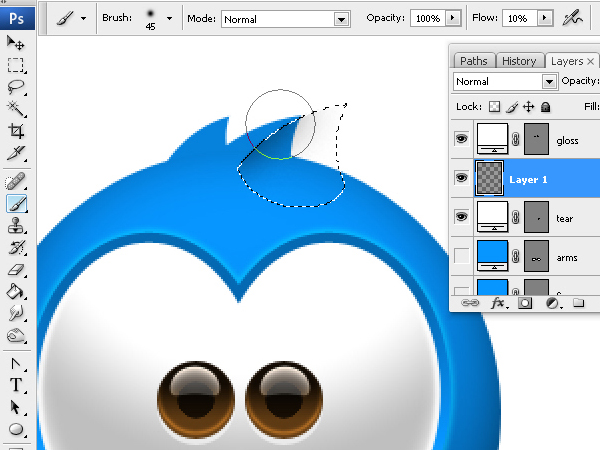
Step 39
With this selection that will be used as a mask, we will now softly paint a shadow on the new layer. Make sure to set the tool just like you see it here in the upper menu. With some clicks we will get a delicate shadow of the object.
Step 40
With the eraser and the values you see here, we will erase the paint excess. We will repeat all the steps to paint the second lock of hair.

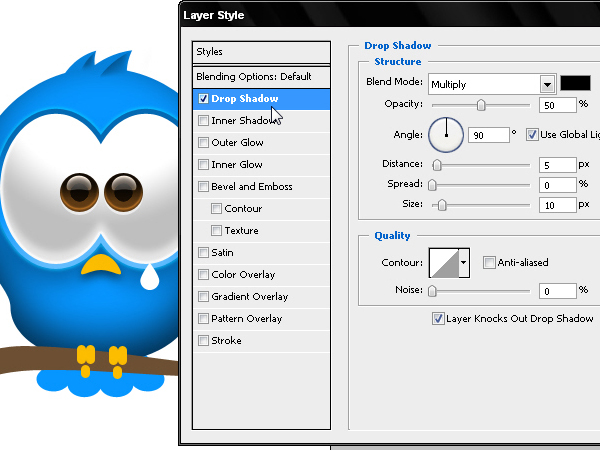
Step 41
Now we will work on the bird’s beak. First we will add a projected shadow towards down.
Step 42
Then we will use an inverted Inner Shadow to create a shadow on the inferior area of the beak.
Step 43
An Inner Glow to surround the beak with a light reflection on its perimeter.
Step 44
With two new circular shape layers and a 30% transparency we will add a Drop Shadow but to light. With these values you will be able to create an inferior bevel that will simulate a hole in the beak’s surface.
Step 45
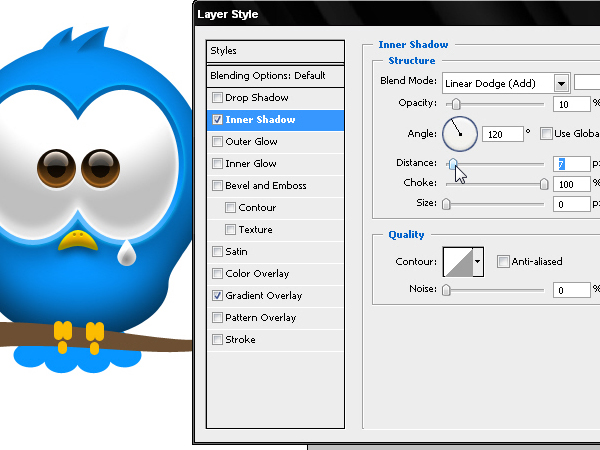
Now we will work on the tear. Apply a radial Gradient Overlay to create a relief area on its center.
Step 46
An Inner Shadow to light, unclicking the global light and taking the values to the extreme for this effect to be very sharp, as if it was an acrylic glow.
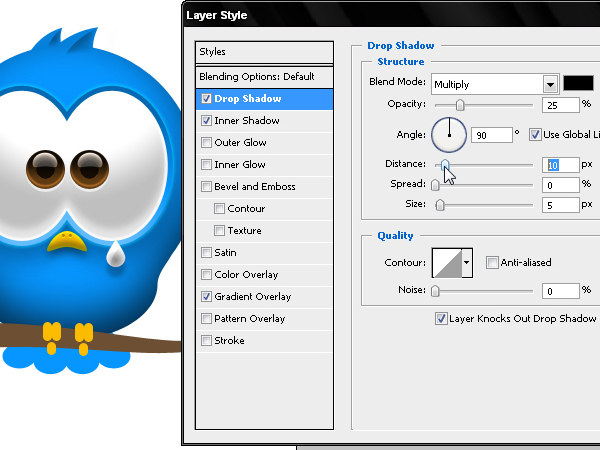
Step 47
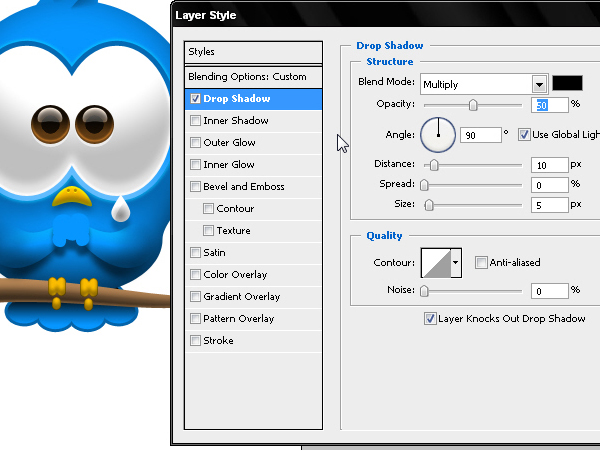
Finally, a projected shadow towards down will separate the tear from the background.
Step 48
We will work on the bird’s feet. With an inverted Inner Shadow we will create the areas where the light that comes from above at 90 degrees.
Step 49
Add an Inner Glow but to get it darker allows us to give a more 3D aspect to these vectors.
Step 50
Let’s work now on the tail feathers. A gradient will allow us to create a shadow underneath the branch and above the feathers.
Step 51
Finally, a 3 pixels stroke to make a bevel on the feathers, using a darker tone than the character’s body.
Step 52
We will add some relief to the tree branch. With Bevel and Emboss and these values we get the cylindrical aspect of the object.
Step 53
An Inner Shadow but to light the inferior area of the branch to reinforce the shadowed area with a reflection coming from the general light.
Step 54
We will continue with the arms and the Bevel and Emboss effect with the values shown here.
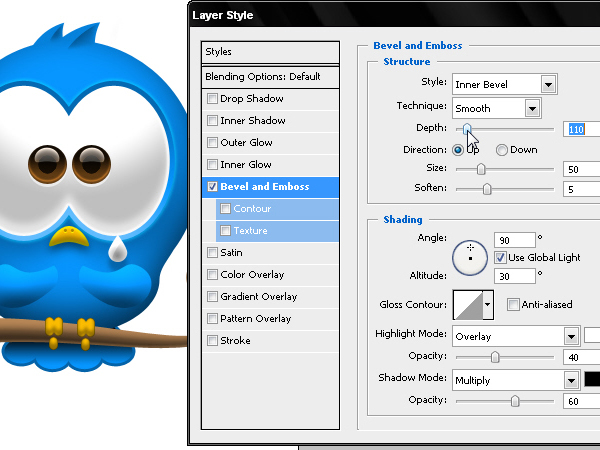
Step 55
Don’t forget to check the Layer Mask Hides Effect option that will allow us to hide part of the arms with a hand painted mask.
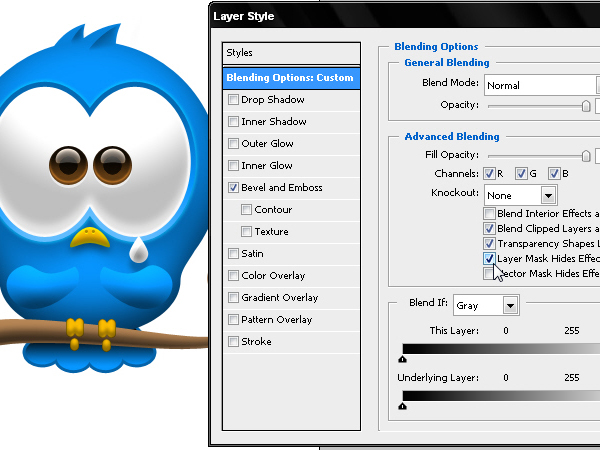
Step 56
We will now create a selection around the arms and will convert it into a mask.

Step 57
Let’s paint the mask. With black color, the mask hides the contact area between the arm and the body, helping both objects to integrate better.
Step 58
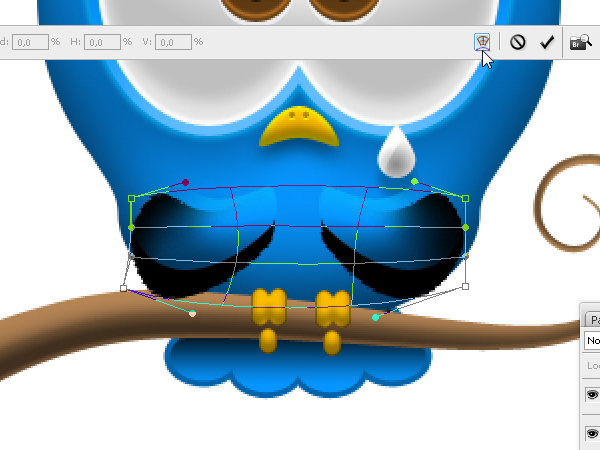
Now we will create the shadow for these arms but it won’t be automatic – using layer styles- because we also need to hide some areas from the shadows. By selecting the arms Shapes we will convert them into selection in the Path section.
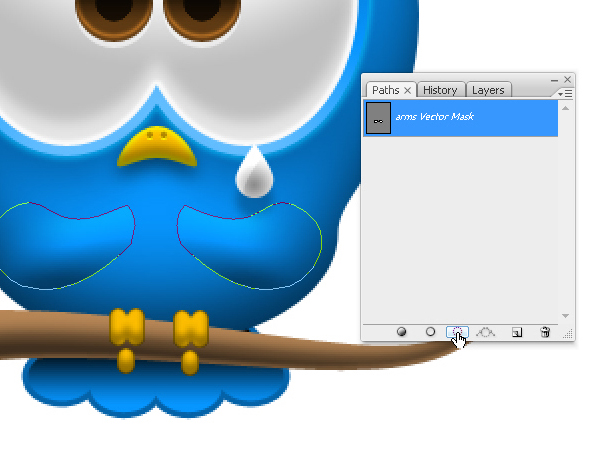
Step 59
We will paint black the selection we’ve obtained and then pressing Cmd/Ctrl + T and clicking on the Wrap Tool icon on the upper menu, we will distort this shadow for it not to be identical to the arms’ shape.
Step 60
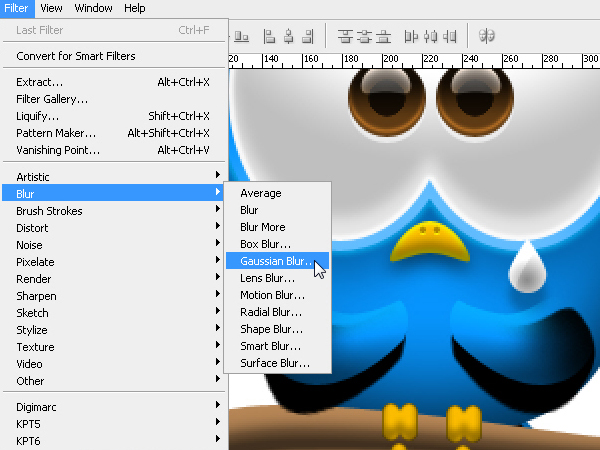
Now we will make the shadow softer with a Gaussian Blur of 2 pixels.
Step 61
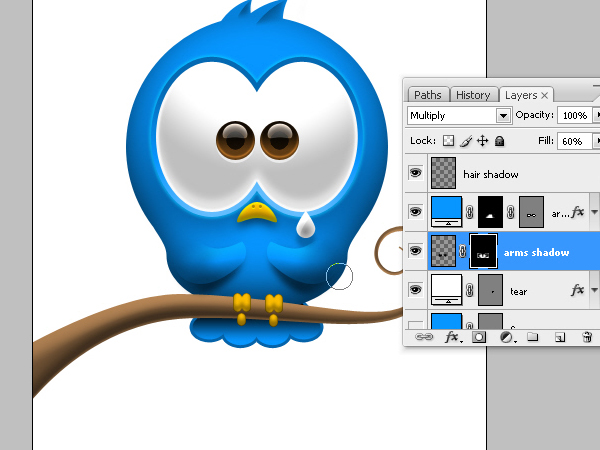
We will mask this shadow and with the Brush tool we will paint the mask black. Then we will hide a layer again with the idea of integrating those shadows to the character’s body.
Step 62
The fists also require the same layer style job and masking. Let’s start with a projected shadow.
Step 63
With Bevel and Emboss we will give the 3D shape to these vectors.
Step 64
We will reinforce the inferior shadow of the fists with an inverted Inner Shadow.
Step 65
A bit of Inner Glow will give a touch of light to the upper area of the hands.
Step 66
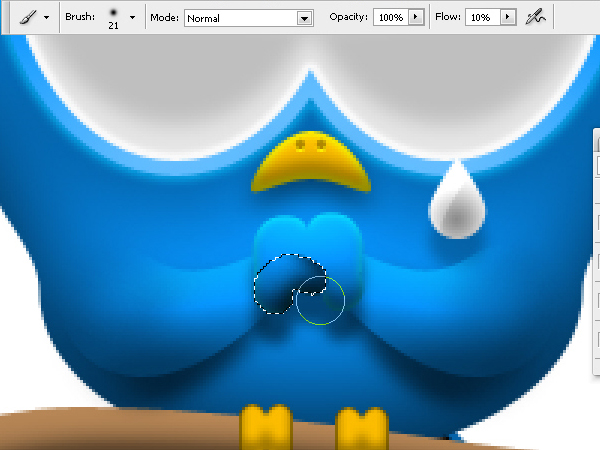
Every finger we’ve drawn before will be converted into selection and we will paint fingers in different layers.
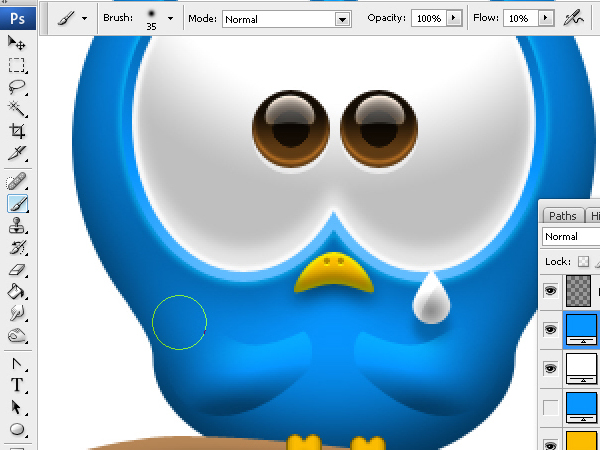
Step 67
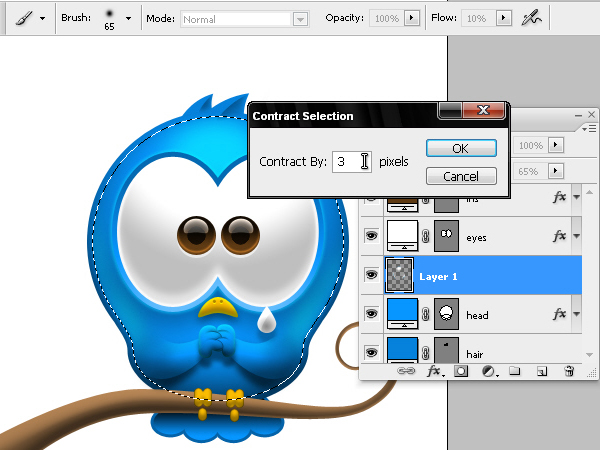
With the shape layer converted into selection, we will paint on a new layer the shadow area of the little finger and the palm of the hand. Use a small point Brush and a soft flow of 10% giving just some touches in the key areas but avoiding the excess.
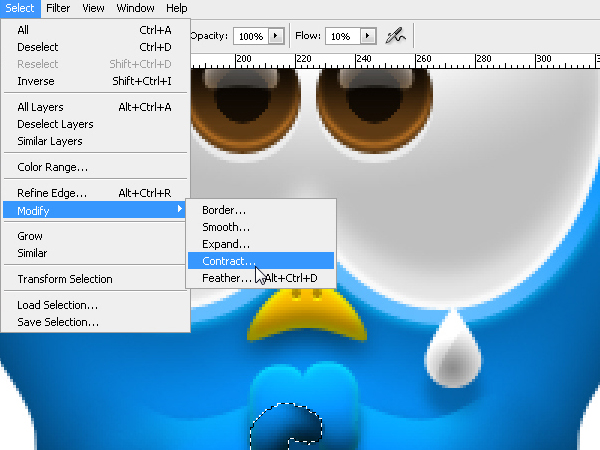
Step 68
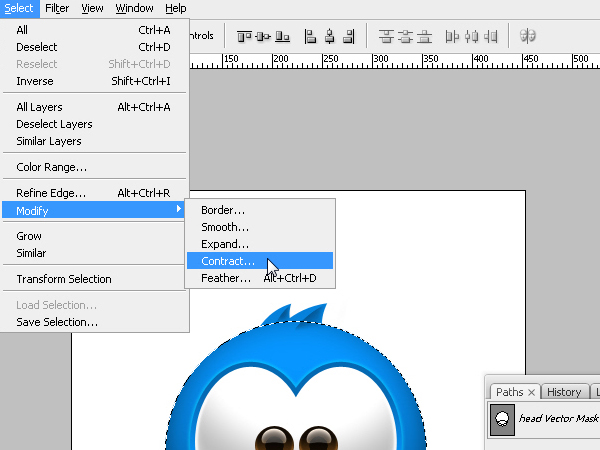
We will contract the selection 1 pixel to erase the excess.
Step 69
Let’s paint the mask. With black color, the mask hides the contact area between the arm and the body, helping both objects to integrate better.
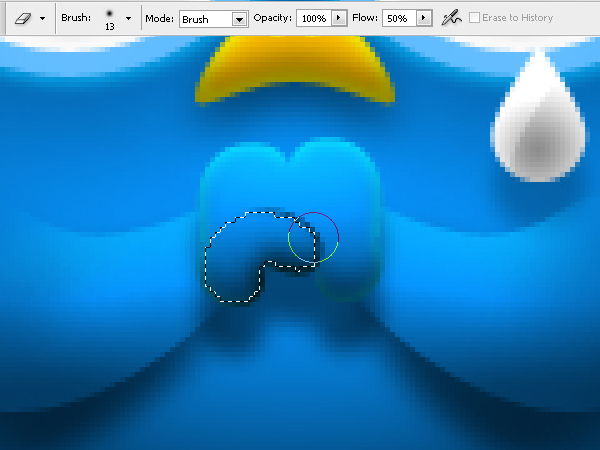
Step 70
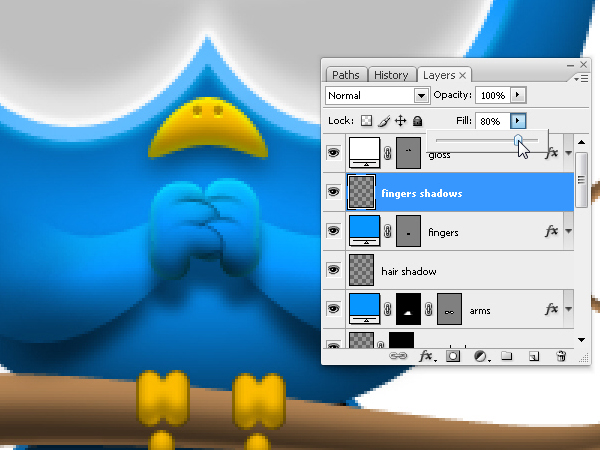
We will repeat the same steps to paint and erase each finger, always using different layers. When we are finished, we will keep on erasing the excess to make the fingers look intertwined. Once you are finished, select all the layers and link them with Cmd/Ctrl + E. Then you can decrease the intensity of these shadows by increasing the layer transparency.
Step 71
We just have some reflection and light details to add to the bird’s body. We will select its shape layer and we will convert it into selection as we’ve learnt in the previous steps.
Step 72
Let’s contract the selection about 5 or 6 pixels.
Step 73
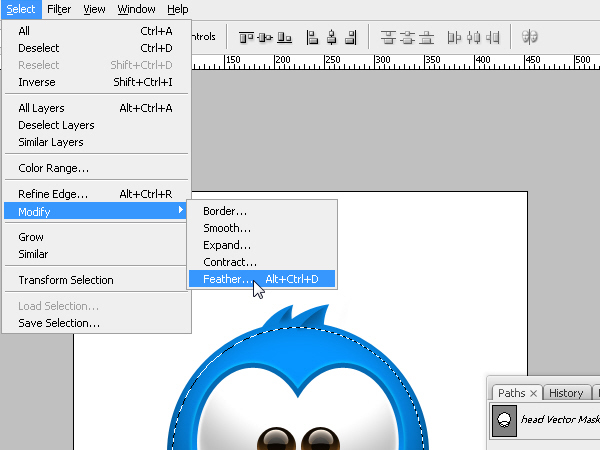
Then we will make this selection softer about 2 or 3 pixels.
Step 74
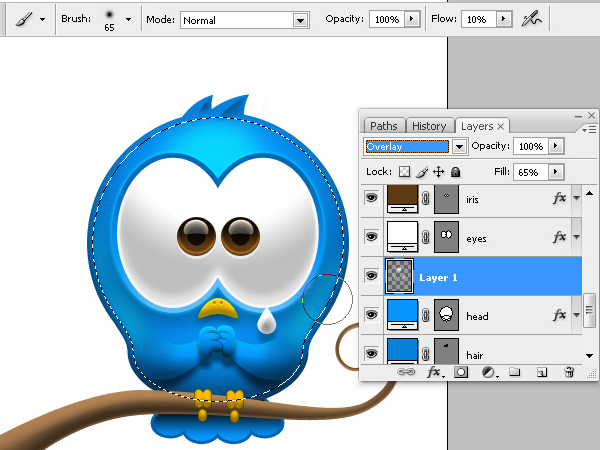
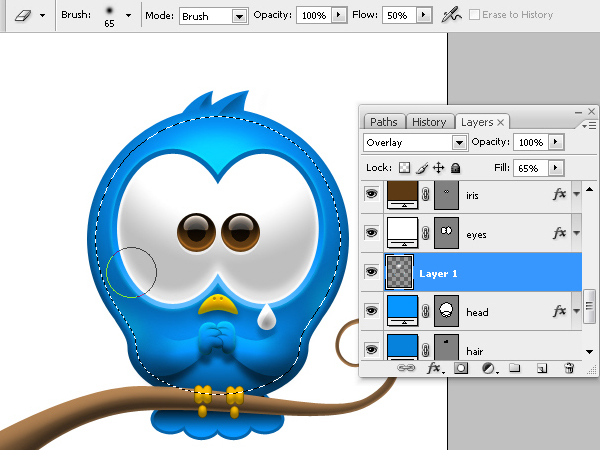
With this selection reduced and softened, we will create a new layer and using Blend Overlay we will paint the sides of the character and its front in the area above the eyes.
Step 75
Now we will keep contracting the selection to erase the excess considering the side reflections should look like a thin line, as what the eye is looking at is a reflection over the object’s sides: as it is a reflective surface, it cuts the gradient formed by this light source.
Step 76
We will now erase the paint excess. By pressing Cmd/Ctrl + H you can hide the selection to see better the area you are working on.
Conclusion
Using any background and a Call To Action headline, our Twitter icon is now complete!


ليست هناك تعليقات:
إرسال تعليق